The trials and tribulations of a scatter-brained kitchen junkie.
Showing posts with label 52weeksofcooking. Show all posts

Thursday, March 29, 2012

Week 9 (Cooking) - Coffee Rub Pork Tenderloin

Week 9's challenge was coffee. I've had this recipe from budget bytes kicking around for a while and though I'd give it a go. Unfortunately I was not a fan of this flavor at all and most of the cut of meat has been scrapped to the dog. I don't know if I made a wrong turn somewhere, or if coffee and pork just don't work for me, but this one was a bust. I'm documenting this occasion for posterity's sake but I see no need to share the step-by-step on a failed recipe.

The Rub looked tasty


The finished product however was very meh.


Suggestions? Thoughts?
Leave a comment or email me at bakemeupbuttercup@gmail.com

Thursday, March 8, 2012

Week 8 (Cooking) - Slow Cooker Chicken Sloppy Joes

Week 8's challenge was slow cooking which elated me because I am all about slow cooking. Being a full time employee, part time student, full time crazy dog owner... I love my slow cooker. I love tossing things together in the morning and not having to worry about it again until the evening. I love that the house smells like delicious food all day. I love not feeling rushed to throw together an evening meal.


The original plan for the week was for turkey sloppy joes, but when the grocery store was out of ground turkey I went for the next best thing. What a happy surprise this turned out to be.

After slow cooking for 8 hours this slightly healthier sloppy joe mix was indistinguishable to me from traditional beef slop. Hoorah for healthy options!

Chicken Sloppy Joes

  • 2 lbs ground chicken
  • 1 onion
  • 1 green pepper
  • 1 red/orange pepper
  • 1 can (10 3/4 oz) reduced sodium tomato soup
  • 1/4 c yellow mustard
  • 2 oz can tomato paste
  • 1 c ketchup
  • 2 tbsp chili powder
  • 2 tbsp crushed red pepper flakes (optional)
  • Hamburger buns, rolls, etc. to serve


  1. In a large skillet combine the ground chicken, onion, and peppers; cook over medium-high heat until chicken is cooked thoroughly and no longer pink. Using a heat safe spatula, break up any large chunks of chicken as you go.


  2. Transfer chicken mixture to slow cooker; add all other ingredients, and stir to combine.

    It isn't pretty to start with, but it sure is tasty in the end.

  3. Cook on low setting 6-8 hours.


  4. Portion onto hamburger buns or hoagie rolls and serve with your favorite sides. I made sweet potato fries. Mmm mmm mmm.

Delicious and hearty, this simple slow cooked meal was a big hit. This one is a keeper!


Monday, February 13, 2012

Week 6 (Cooking) - Pudim de Coco (Brazilian Coconut Pudding)

Week six of the cooking challenge is upon me and wouldn't you know it, this run of the mill white girl doesn't know a thing about Brazilian food. To the internet!

As per what seems to be a developing cookiecrumbles tradition, I had originally opted for a very different recipe. But, as luck would have it I could not get a proper translation of it at home. The recipe I had found for pao de queijo (Brazilian cheese rolls) translated fine at work, but when I pulled up the same recipe at home it kept telling me that I needed 4 cups of candy as the first ingredient; as exciting as that sounds, it just wasn't right. It turned out this was a magnificent misfortune as about 1/2 of the other 52weeksof participants seemed to have opted for the same dish and I like to stand safely outside the norm.

Pudim de Coco

Be sure to absolutely mangle the can while opening it.

  • 1 can (13.5 oz coconut milk)
  • 13.5 oz milk
  • 6 tbsp sugar
  • 3 tbsp corn starch
  • 3 tbsp coconut flakes
  • Additional coconut flakes for serving (optional)


Recipe comes from sonia-portuguese.com


  1. Combine all of the ingredients in a medium size pot over medium heat.


  2. Cook 10-15 minutes (I pulled mine right at 12), stirring regularly, until mixture becomes very thick. . Make sure you're scraping the bottom as you are stirring otherwise the coconut will settle to the bottom and burn.

    The pudding will bubble and boil so keep stirring.
  3. Transfer to a pudding mold that has been rinsed in cold water. I don't own a pudding mold so I divided the pudding into 4 large muffin cups.

    No pudding mold? No problem! Muffin tins are close enough.
  4. Allow to cool to room temperature.
  5. Refrigerate until the pudding is somewhat solid and retains it's shape.
  6. Unmold, plate, and sprinkle with coconut flakes.
    The unmolding didn't turn out quite as pretty as I would have liked - one transfered neatly onto the kitchen floor though - so I mashed it up a bit before sprinkling. No one will ever no. Unless, you know, you post it on the internet.

    No quite a perfect mold, but flavor has no shape.


I opted not to make the plum sauce listed in the original recipe not because I hate plums, but because I just didn't have any in the house and there was absolutely no way I was dragging myself to the store for them. The pudding was delicious without it, I can't imagine adding a sweet sauce over this dish.


Do you have any experience with Brazlian food? How'd I do?
Have a recipe you want to share with me/the rest of the world?
Questions? Leave a comment or email me at BakeMeUpButtercup@gmail.com

Monday, February 6, 2012

Week 5 (Cooking) - Spinach, Tomato, Sausage, and Ravioli Red Wine Bake

Already the first week of February has come and gone and with it the week 5 cooking challenge of alcohol. I hemmed and hawed over this challenge but couldn't make up my mind on a dish; I don't typically cook with alcohol and nothing sounded particularly appealing. So in the end I did as I always do, when it doubt, make it up as you go along!

I spent a day or two thinking of flavor combinations I enjoyed and then pieced this together with what I had in the house. I had to run out for ravioli and sausage, but all in all not too shabby. The dish I created was a baked cheese ravioli with spinach, tomatoes, and hot Italian sausage, tossed in a red wine sauce; then covered in shredded cheese - pepper jack & part-skim mozzarella - and baked to perfection.

  • 1 package (5 links) Italian sausage
  • 10 oz package frozen spinach, thawed and thoroughly drained
  • 1 14 oz can diced tomatoes, undrained
  • 2 6 oz cans tomato paste
  • 1 cup dry red wine
  • 2-3 cloves garlic, minced or diced, optional
  • 1-2 tsp crushed red pepper, optional
  • Spices to taste - Oregano, basil, thyme, fennel seeds...
  • 25 oz (give or take) cheese ravioli, fresh or frozen
  • 1/4 c - 1/2 c shredded cheese - I use about a 1/4 pepperjack (because I love spicy things) and 1/4 c shredded part-skim mozzarella. 


  1. Remove sausage from casing and cook over medium-high heat on a large non-stick pot/wok breaking into small pieces, until browned.
  2. While sausage is cooking bring a large pot of water to boil.
  3. Preheat the oven to 350°.
  4. When the sausage it browned, set it aside in a separate dish, and pour off any grease remaining in your pot; however, it's not necessary to wash/wipe out the pot. 
  5. Cook spinach for 3-5 minutes.
  6. Add diced tomatoes, tomato paste, red wine, garlic cloves and spices.

    As you can see here, I didn't cook my spinach first...live and learn.

  7. Bring sauce to a boil.
  8. Stir in the cooked Italian sausage.


  9. Reduce heat, and simmer for 5-7 minutes.


  10. Once the water is boiling, add ravioli and cook according to package instructions.


  11. Drain ravioli and toss in reduced sauce.


  12. Transfer to a large casserole dish.
  13. Sprinkle cheese evenly over the top.


  14. Cook uncovered for 15-20 minutes until cheese is melted and just begins to brown.
  15. Remove from oven and allow to cool for roughly 5 minutes before serving.
  16. Dig in.
Note: If your sauce seems too thick you can thin it down with an extra splash of wine before adding the ravioli. If it's REALLY thick, you can add store bought marinara sauce until your desired consistency  is reached. If this affects your flavors, add additional spices, wine to taste.

As mentioned in the above photograph, I didn't cook the spinach beforehand because... well... I didn't think I needed to. So while this dish was delicious, the spinach was a bit stringy and definietly should have been cooked briefly before adding the other elements. I've corrected that for you, and will do so for myself in the future.


Happy dining!

Thursday, February 2, 2012

Week 4 (Cooking) - Pan Frying Coconut Chicken & Mango Avocado Salsa

For the theme of pan frying I chose to make one of my favorite dishes of all time, coconut chicken. And because coconut chicken in incomplete without fantasimic sides to compliment it I made a big batch of mango salsa, and a side of cilantro & lime rice steamed white rice from the Chinese restaurant down the road. Can you say yum?

It looks a little dark, but it was perfectly crispy and moist. 

Mango Salsa


  • 3 mangos, peeled and sliced
  • 3-4 tbsp fresh cilantro, chopped
  • 3 roma tomatoes, seeded & chopped
  • 1/2 red onion, chopped
  • 1-2 jalanpenos (according to your tastes) seeded if you prefer, diced
  • 2 avocados, peeled, chopped
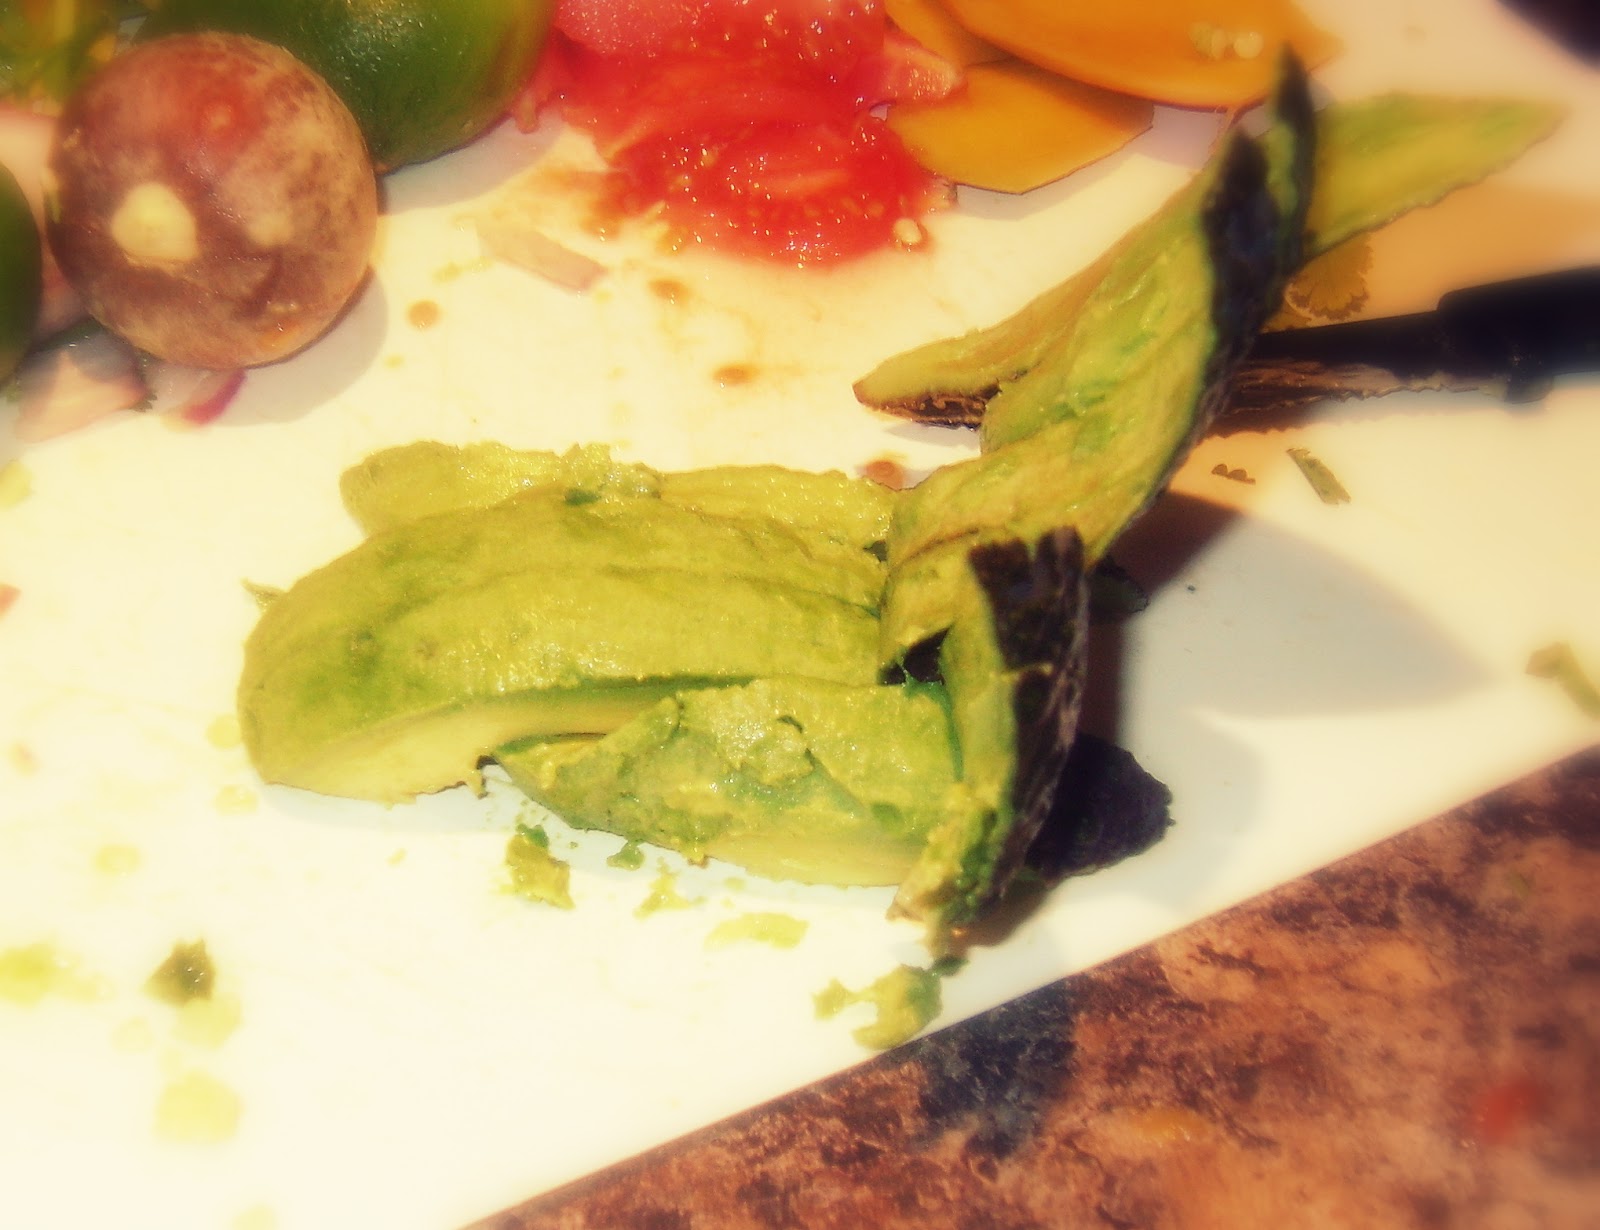
    A handy trick for peeling avocados if you're lazy or not skilled with a knife (I am both) - remove the seed but leave on the skin. Create long slits lengthwise down the avocado avoiding piercing all the way through  peel. Flip it over onto the counter and pull. back the peel. It should release easily, leaving behind the strips of avocado.

    I felt like Macgyver when I figured this one out.
  • The juice from 2 limes
  • Pinch or two of salt


  1. Mix together the mangoes, cilantro, tomatoes, onion, and jalapenos.


  2. Pour the lime juice over the mixture.
  3. Sprinkle with salt.
  4. Stir.
  5. Taste, adjust jalapenos, salt, lime juice as needed.
  6. Add the avocados and toss gently. I add these last so that the rest of the mixing doesn't mash down the delicate avocado chunks.
  7. Chill for 2-3 hours if possible to allow time for the flavors to mingle.

    Mmmm, so delicious.

  8. Serve with chips, coconut chicken, ... just about anything works with this salsa.
The dicing/chopping aftermath.


Coconut Chicken

This recipe is obscenely easy, the term recipe is used very loosely.

  • Approx. 1/2 c flour, seasoned with garlic, black pepper, and salt; to taste
  • 2 eggs, beaten
  • Approx. 2 cups, sweetened flake coconut
  • 1 1/2 - 2 lbs chicken breasts, cut into strips
  • 1/2c vegetable oil - or any other preferred oil - for cooking


    The battering station.


  1. Preheat oven to 350°.
  2. Put a large skillet over medium heat with cooking oil.
  3. Roll each piece of chicken in the seasoned flour mixture.
  4. Dip into the beaten eggs, coating fully. Allow excess to drip off.
  5. Roll the chicken in coconut, assuring a thick, even coating.

    Working down the assembly line.

  6. Set on a plate while you prepare the rest of the chicken pieces.
  7. When oil is sufficiently hot carefully place chicken pieces in oil, allowing room on each side of the strips of chicken.
  8. Cook for 1 - 1/2 - 2 minutes until coconut is browned evenly.
  9. Flip.
  10. Cooking the other side for roughly the same amount of time, removing when browned.

    This batch got a little dark for  pretty picture making, but I like it crispy.

  11. Remove pieces from oil, pat off excess oil using a paper towel and place a baking sheet  in an even layer with a small amount of room around each piece.
  12. Repeat with all remaining chicken.
  13. Bake for 10-12 minutes until centers are no longer pink and juices run clear.
  14. Move to a serving platter.
  15. Dig In.

As mentioned above, I had attempted to make a fun cilantro lime rice to go with this dish but two very awful things happened to prevent this from moving forward.

  1. I added add a 1/2 c lime juice as part of the liquid when making rice.  Never ever ever repeat this mistake. I thought I was doing something amazing to make super limey rice. It was absolutely terrible.
  2. My rice cooker decided it was cool to super overcook the rice into a giant vat o'mush. Way to go rice cooker, you saved me from having to admit to my family that I'd ruined the rice by adding a ton of lime juice to the mix. Instead I just got to say that the texture was the reason we weren't eating it. To be honest though, I'm not sure what was worse, the texture or the taste. It was bad. Really, really, exceptionally bad. 
This contains lime juice & fresh cilantro.
Do not ever do this to your poor rice, it didn't do anything to you.

My mom saved the day, and family dinner which I had haphazardly agreed to host, by running down the street to a local Chinese restaurant and picking up a few containers of white rice. They know how to make rice not suck, I apparently should be taking notes.


Monday, January 23, 2012

Week 3 (Cooking) - Chicken Tomatillo Soup

The cooking challenge for week 3 was soup. S(o)uper easy that is.

I love soup, but for years I was afraid of making it myself. My mom is a soup goddess and I am always assumed that my soups would just fail completely when compared to the deliciousness this deity creates.

I may have a cooking complex.  

In the last year or two I've started venturing outside of my no-soup zone and dipping my pinky toe into the icy cold waters of soup-dom. (Why is soup icy? I don't know, ssshhhh...) So far so good, and my slow cooker has been my best friend on these adventures. I love that I can toss stuff in, crank that baby down low, cover it up, skirt out the door, and come home to warm, tasty food. Plus these are some of the most balanced meals I can create in a pinch; protein, veggies, carbs...Soup has it all baby! Soup is, in every way, perfect. Especially for winter.

I have about 5 jillion recipes booked marked here and there, and probably at least a third (1.67 jillion that is) of the recipes are for soup. This week's recipe was an adaptation from one I found on  Better Homes & Gardens website that I just haven't had the gumption to make yet. Excuses no more, soup week is here.

Slow cooker recipes couldn't be simpler and I feel a bit silly detailing this, but detail I must.

Spicy Chicken Tomatillo Soup

  • 7 medium tomatillos, husks removed & rinsed

    I had no idea how sticky and weird these things felt. shudder
  • 2 lbs boneless skinless chicken breasts
  • 32 oz low sodium chicken broth
  • 1/2 red onion chopped
  • 2 stalks of celery, chopped
  • 4 oz canned diced green chilis
  • 1 large fresh jalapeno, chopped - I leave the seeds, some people prefer to tone the spice down and remove them, your call.


  • 1 tbsp ground cumin
  • Juice from 1 lime


  • 2 heaping tsp chili powder - Again adjust to taste
  • 3 cloves garlic, minced
  • 1 tsp salt
  • 1 tsp ground black pepper


  1. Dice 3 of the tomatillos.
  2. Put the other 4 in a food processor and blender to create a smooth paste.

     
  3. Combine all of the ingredients in a 3 1/2 - 4 qt slow cooker.


  4. Cover.
  5. Set on low heat for 6-7 hours or on high for 3 1/2-4 hours.
  6. Remove the chicken from the broth.
  7. Allow to cool slightly.
  8. Shred it!


  9. Slide the chicken back into the stock.
  10. Mix to combine the chicken with the broth.
  11. Serve yourself a nice big bowl with some tortilla chips & salsa. Mmm.

Wednesday, January 18, 2012

Week 2 (Cooking) - Fried Rice, Sesame Chicken, & Coconut Ice Cream

We're now onto week two of the 52 weeks of cooking challenge and our theme, inspired by the Chinese New Year, is Chinese cuisine. Hey-ho something else I have no expertise in. I always thought I was a decently well rounded cook but the challenges are making me second guess myself. Hrmmm...

My apologies if my recipes (or dishes themselves for that matter) are less than authentic. I tried to do my research and stick with recipes that were Chinese in origin and not inadvertently veer off into another ethnicity which is apparently easier than I had realized. Anyone who is more knowledgeable on the subject can feel free to lecture me on my shortcomings.

My original idea was to keep it simple and go with chicken fried rice, but gradually over the course of a few days I realized that simple just wasn't me; I started searching for more recipe and realized I already had everything in the house to make sesame chicken. It was decided, a mini Chinese  feast was to be had. All though I'm sure this is somewhat Americanized Chinese I was still excited to take this on.

The menu consisted of two main dishes and a yummy dessert of questionable orient origins. Vegetable fried rice, sesame chicken, and coconut ice cream.


Sesame Chicken
The recipe I started from came from food.com. I have my suspicions that this recipe had a heavy American hand, but is sounded delicious and most importantly, doable. This recipe needed a fair bit of altering to reach a flavor level that was appealing though. The sauce was kind of bland in the beginning and needed more spices to bring in to life; I added extra red pepper flakes and ginger, and cloves of garlic to bring in some flavor.

At the suggestion of the creator of the recipe I went ahead and doubled the sauce needed because the original recipe apparently made just enough to toss the chicken in and I am a sauce girl. I love dipping things in sauce, doesn't matter what it is, if I can dip it, I do. It turns out the sauce level was pretty good for the chicken, but it was still nice to have a little extra to drizzle over my rice.
  • 2-3 tbsp. sesame oil 
  • Boneless skinless chicken tenders approx. 2 lbs. cut into 1 in pieces
  • 1 c honey
  • 1 c reduced sodium soy sauce
  • 2 c water
  • 4 tbsp corn starch
  • 4 tsp fresh grated ginger
  • 5 tsp red pepper flakes - they claim these are optional, not in my house
  • 5 cloves garlic, minced
  • 1-2 tbsp toasted sesame seeds
Sauce
  1. Combine the honey, soy sauce, and water. 
  2. Whisk in cornstarch until completely dispersed.
  3. Add ginger, red pepper flakes, and garlic.
  4. Stir to combine. 
  5. Set aside.
Chicken
  1. Heat the oil in a wok over medium high heat.
  2. Stir fry the chicken.
  3. When chicken is no longer pink and starting to brown on the outside add in about half the sauce.
  4. Cook until sauce begins to thicken.
  5. In a separate pan add the remainder of the sauce over medium high heat as well and cook, stirring often until it begins to thicken as well.
  6. Reduce heat, cover, and simmer for 10 minutes.
  7. Serve portions with toasted sesame seeds sprinkled on top.
Save some for leftovers, trust me, on day two this went from yum delicious warm food to OMG give me a shovel to eat with.

**Note - do not pay extra for toasted sesame seeds (or coconut for that matter, but I'll get to that) just buy regular sesame seeds and toast them in the oven at about 200° for 5-10 minutes shaking every few minutes to assure even toasting. It's that simple.


 - - - - - - - - - - - 

Vegetable Fried Rice
The fried rice recipe I decided upon came from allrecipes.com and was originally slated to be chicken fried rice. I removed the chicken since there would be a chicken main course. I also excluded the celery (because I hate celery) and the red bell pepper in exchange for a whole green pepper, it was cheaper this way. It turns out fried rice is stupidly easy and I've been afraid of attempting it all these years for nothing.
  • 1/2-1 tbsp sesame oil
  • 1/2 tbsp hot chili oil - For the bold
  • 1 yellow onion diced
  • 2 tbsp reduced sodium soy sauce
  • 2 large carrots shredded - I shred them to mask the flavor, I also hate carrots. Man I look picky now!
  • 1 cup fresh pea pods
  • 1 large green pepper diced
  • 6 cups cooked and chilled white rice - I made rice with dinner the night before and just made sure to have plenty of extra for this
  • Additional 1/3 c reduced sodium soy sauce
  1. Heat oil in wok over medium high heat. 
  2. Add onion and saute until soft, about 5 minutes.
  3. Add the 2 tbsp of soy sauce and carrots, pea pods, & green peppers. Stir from 5-6 minutes or until veggies loose a bit of their crispness but are still al dente.
  4. Add rice and the last 1/3 c soy sauce, stiring slowly and breaking up clumps.
  5. Heat until cooked through. 
  6. Serve hot.

If I could do it over...
The only thing I'd really change in this recipe is the portions; this batch was massive. By the time I finished cooking the veggies I was well aware of the fact that I had no room left in my wok for the rice. So I halved the veggies, and the rice and cooked one smaller batch with what I had. The rest of the rice and veggies are packaged away separately for round two later this week. After we finish eating the leftovers from round one.

Okay, I lied, I'd also change the recipe by adding more pea pods. I loooove pea pods. 

 - - - - - - - - - - - 

Coconut Ice Cream
Last but not least, coconut ice cream. This recipe came from an about.com series about Chinese food, so I'm hoping it's actually a Chinese dish, but I apologize if it's not. Either way, coconut ice cream is where it's at.

One of the things that caught my eye with this recipe is that there is not dairy, rather coconut milk is used in place. Mmm double coconut goodness.

I had to mess about here and there with this recipe to account for the fact that out of the three groceries stores I frequent, one with an entire section dedicated to Asian delights, I could not find unsweetened coconut flakes anywhere. I'm sure if I had time or energy to check a few more stores I could have tracked them down, but that just wasn't in the cards for this week.

  • 4 cups unsweetened coconut milk
  • 1/2 sugar
  • 1/4 tsp coconut extract
  • 1 1/4 c sweetened coconut flakes
  • Toasted coconut to garnish (see note above about toasting your own)


With an ice cream maker
  1. Combine all of the ingredients in the bowl of your ice cream maker.
  2. Stir to combine.
  3. Refrigerate cylinder and mixture for about an hour, or twenty minutes in the freezer for the impatient. 
  4. Do what ever magic you need to do to set up and get your ice cream maker moving. 
  5. Let it do it's thang.
  6. Remove when done doing it's thang.
  7. Eat.

Without an ice cream maker (you poor soul)
  1. Combine the coconut milk & sugar, stir until the sugar dissolves.
  2. Add the coconut extract and coconut flakes and mix until combined.
  3. Place in freezer and stir occasionally (every thirty minutes or so) until hardened.
  4. Once desired consistency is reached, eat it.
It turns out I am glad I had the sweetened coconut flakes, this recipe was very...un-ice-creamy. I am going to admit a foul on my part here and say that I am pretty sure I took this recipe from the orient to a Chicagoian back alley bakery. I originally tried to cut the sugar from the original recipe down since I was using sweetened coconut, but that didn't suit my tastes. So I added the full amount of sugar. Then I doubled the sugar content. Then I left it there out of fear of diabetes, but it still could have been a bit sweeter for my overly processed, high fructose corn syrup adjusted taste buds.

What I got was a sweet creamy dessert resembling in texture something between soft serve and "normal" ice cream. It was very delicious and not very sweet. I quite enjoyed it and will be going back to it to finish the batch.


If I could do it over...
I really wish I would have shredded the the shredded coconut. The individual strands were very long and awkward in a dessert. They made the ice cream chewy and strange. I didn't really mind, but the BF said it was a problem for him. When I make it again I will probably run the shredded coconut through the food processor to break it down further. Oh, and I'll probably add some chocolate chips too.


 - - - - - - - - - - -

All of the dishes were delicious and the entrees were even better on days two (and three, and...) I will most definitely be making each of these recipes again.