The trials and tribulations of a scatter-brained kitchen junkie.
Showing posts with label Coconut. Show all posts

Friday, April 6, 2012

Week 9 (Baking) - Samoa Bar Cookies

Week 9 of the baking challenge was cookies. I make lots (and lots and lots and...) of cookies so I thought I'd take this chance to try out something new and fancy.

Girl Scout Cookie season is upon us but with my excessive arsenal of cooking supplies I have to admit, I feeling guilty buying cookies, so I'll make them to satiate my palate instead. This is another one of those recipe that I snagged off the internet but never put to use. 52weeksof, you really are broadening my horizons, even if it is by force. ;)


Samoa Bar Cookies
Recipe is from bakingbites.com

Cookie Base
  • 1/2 cup sugar
  • 3/4 c butter, softened
  • 1 large egg
  • 1/2 tsp vanilla extract
  • 2 cups all purpose flour
  • 1/4 tsp salt
  1. Preheat the oven to 350°.
  2. Either grease or line a 9x13 cake pan.
    You can line with parchment paper or aluminum foil.
  3. Cream together butter and sugar until fluffy. 
  4. Beat in egg and vanilla extract.
  5. On low speed gradually beat in flour and salt until mixture is crumbly.


  6. Pour/scoop the dough into your greased/lined 9x13 pan and pat down evenly to form the crust.
    This part takes patience, it does take a long while to get the crust even and smooth, but practice makes perfect. 
  7. Bake for 20-25 minutes (mine took all 25 minutes) until the base is set and just starting to brown.

    The finished crust
  8. Cool completely before adding the topping. 

Topping

  • 3 cups shredded coconut
  • 12 oz chewy/soft caramels
  • 1/4 tsp salt
  • 3 tbsp milk


  1. Preheat/turn oven to 300°. 
  2. Spread coconut evenly over a parchment lined baking sheet.
  3. Toast 20-30 minutes, stirring ever 5 minutes or so, until the coconut is evenly browned and crispy.
    Cool coconut completely before moving on to the next step.

    Look at that crunchy deliciousness.
  4. Unwrap the caramels and place in a microwave safe bowl with the milk and salt. 
  5. Microwave on high in 1 minute burst, stirring in between, until caramels are melted and mixture is full combined.


  6. Fold coconut into the caramel mixture.
  7. Smooth the coconut & caramel combination over the crust.
    This takes a lot of patience, the mixture is super sticky and rough to move about. Breathe slowly, yelling at the coconut does nothing, trust me.
  8. Allow topping to cool until set.


Base Coat & Drizzle

  • 10 oz dark chocolate

  1. Once the topping has set, cut the bars to desired size. I kind of guessed at this and came up with awkwardly sized/shaped bars. Though still delicious, I will be a bit more careful next time for presentation purposes.
    Pro-tip: I used a pizza cutter to zip through these and it made cutting a breeze.

    My not-so-symmetrically-cut cookies.
  2. Melt the dark chocolate either:
    In the microwave on 1/2 power (or defrost mode) in 30 second bursts, stirring after each session, until melted. Make sure the dish you are using is large enough to allow you to thoroughly dip the base of each cookie.
    Or in double boiler, stirring regularly, until melted. Transfer to a bowl large enough to dip each cookie.
  3. Tear sheets of wax paper and set near where you will be finishing the bars.
  4. Dip each bar into the melted chocolate, allow excess to drip off, and place on waxed paper.
    Repeat for each cookie.


  5. After all of the cookies have been dipped, drizzle the remaining chocolate over the cookies.


  6. Allow chocolate to set completely, plate, and enjoy.


Monday, February 13, 2012

Week 6 (Cooking) - Pudim de Coco (Brazilian Coconut Pudding)

Week six of the cooking challenge is upon me and wouldn't you know it, this run of the mill white girl doesn't know a thing about Brazilian food. To the internet!

As per what seems to be a developing cookiecrumbles tradition, I had originally opted for a very different recipe. But, as luck would have it I could not get a proper translation of it at home. The recipe I had found for pao de queijo (Brazilian cheese rolls) translated fine at work, but when I pulled up the same recipe at home it kept telling me that I needed 4 cups of candy as the first ingredient; as exciting as that sounds, it just wasn't right. It turned out this was a magnificent misfortune as about 1/2 of the other 52weeksof participants seemed to have opted for the same dish and I like to stand safely outside the norm.

Pudim de Coco

Be sure to absolutely mangle the can while opening it.

  • 1 can (13.5 oz coconut milk)
  • 13.5 oz milk
  • 6 tbsp sugar
  • 3 tbsp corn starch
  • 3 tbsp coconut flakes
  • Additional coconut flakes for serving (optional)


Recipe comes from sonia-portuguese.com


  1. Combine all of the ingredients in a medium size pot over medium heat.


  2. Cook 10-15 minutes (I pulled mine right at 12), stirring regularly, until mixture becomes very thick. . Make sure you're scraping the bottom as you are stirring otherwise the coconut will settle to the bottom and burn.

    The pudding will bubble and boil so keep stirring.
  3. Transfer to a pudding mold that has been rinsed in cold water. I don't own a pudding mold so I divided the pudding into 4 large muffin cups.

    No pudding mold? No problem! Muffin tins are close enough.
  4. Allow to cool to room temperature.
  5. Refrigerate until the pudding is somewhat solid and retains it's shape.
  6. Unmold, plate, and sprinkle with coconut flakes.
    The unmolding didn't turn out quite as pretty as I would have liked - one transfered neatly onto the kitchen floor though - so I mashed it up a bit before sprinkling. No one will ever no. Unless, you know, you post it on the internet.

    No quite a perfect mold, but flavor has no shape.


I opted not to make the plum sauce listed in the original recipe not because I hate plums, but because I just didn't have any in the house and there was absolutely no way I was dragging myself to the store for them. The pudding was delicious without it, I can't imagine adding a sweet sauce over this dish.


Do you have any experience with Brazlian food? How'd I do?
Have a recipe you want to share with me/the rest of the world?
Questions? Leave a comment or email me at BakeMeUpButtercup@gmail.com

Thursday, February 2, 2012

Week 4 (Cooking) - Pan Frying Coconut Chicken & Mango Avocado Salsa

For the theme of pan frying I chose to make one of my favorite dishes of all time, coconut chicken. And because coconut chicken in incomplete without fantasimic sides to compliment it I made a big batch of mango salsa, and a side of cilantro & lime rice steamed white rice from the Chinese restaurant down the road. Can you say yum?

It looks a little dark, but it was perfectly crispy and moist. 

Mango Salsa


  • 3 mangos, peeled and sliced
  • 3-4 tbsp fresh cilantro, chopped
  • 3 roma tomatoes, seeded & chopped
  • 1/2 red onion, chopped
  • 1-2 jalanpenos (according to your tastes) seeded if you prefer, diced
  • 2 avocados, peeled, chopped
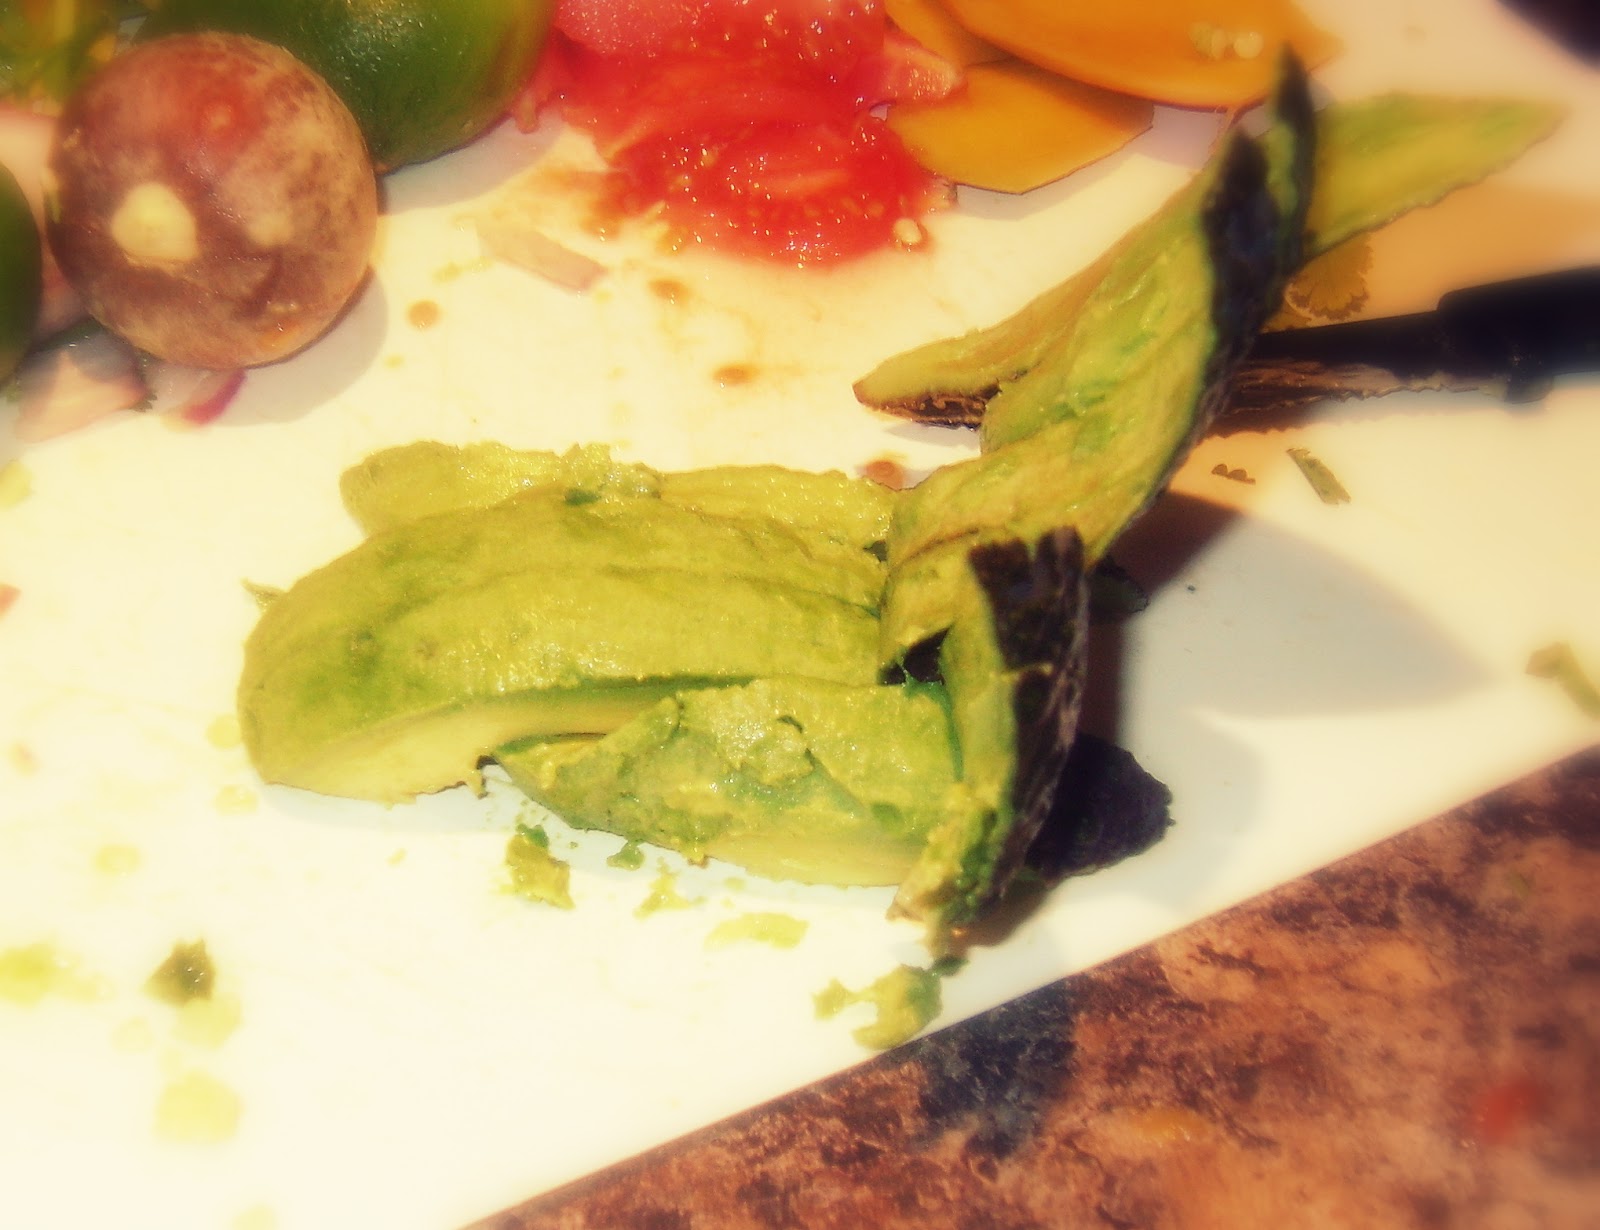
    A handy trick for peeling avocados if you're lazy or not skilled with a knife (I am both) - remove the seed but leave on the skin. Create long slits lengthwise down the avocado avoiding piercing all the way through  peel. Flip it over onto the counter and pull. back the peel. It should release easily, leaving behind the strips of avocado.

    I felt like Macgyver when I figured this one out.
  • The juice from 2 limes
  • Pinch or two of salt


  1. Mix together the mangoes, cilantro, tomatoes, onion, and jalapenos.


  2. Pour the lime juice over the mixture.
  3. Sprinkle with salt.
  4. Stir.
  5. Taste, adjust jalapenos, salt, lime juice as needed.
  6. Add the avocados and toss gently. I add these last so that the rest of the mixing doesn't mash down the delicate avocado chunks.
  7. Chill for 2-3 hours if possible to allow time for the flavors to mingle.

    Mmmm, so delicious.

  8. Serve with chips, coconut chicken, ... just about anything works with this salsa.
The dicing/chopping aftermath.


Coconut Chicken

This recipe is obscenely easy, the term recipe is used very loosely.

  • Approx. 1/2 c flour, seasoned with garlic, black pepper, and salt; to taste
  • 2 eggs, beaten
  • Approx. 2 cups, sweetened flake coconut
  • 1 1/2 - 2 lbs chicken breasts, cut into strips
  • 1/2c vegetable oil - or any other preferred oil - for cooking


    The battering station.


  1. Preheat oven to 350°.
  2. Put a large skillet over medium heat with cooking oil.
  3. Roll each piece of chicken in the seasoned flour mixture.
  4. Dip into the beaten eggs, coating fully. Allow excess to drip off.
  5. Roll the chicken in coconut, assuring a thick, even coating.

    Working down the assembly line.

  6. Set on a plate while you prepare the rest of the chicken pieces.
  7. When oil is sufficiently hot carefully place chicken pieces in oil, allowing room on each side of the strips of chicken.
  8. Cook for 1 - 1/2 - 2 minutes until coconut is browned evenly.
  9. Flip.
  10. Cooking the other side for roughly the same amount of time, removing when browned.

    This batch got a little dark for  pretty picture making, but I like it crispy.

  11. Remove pieces from oil, pat off excess oil using a paper towel and place a baking sheet  in an even layer with a small amount of room around each piece.
  12. Repeat with all remaining chicken.
  13. Bake for 10-12 minutes until centers are no longer pink and juices run clear.
  14. Move to a serving platter.
  15. Dig In.

As mentioned above, I had attempted to make a fun cilantro lime rice to go with this dish but two very awful things happened to prevent this from moving forward.

  1. I added add a 1/2 c lime juice as part of the liquid when making rice.  Never ever ever repeat this mistake. I thought I was doing something amazing to make super limey rice. It was absolutely terrible.
  2. My rice cooker decided it was cool to super overcook the rice into a giant vat o'mush. Way to go rice cooker, you saved me from having to admit to my family that I'd ruined the rice by adding a ton of lime juice to the mix. Instead I just got to say that the texture was the reason we weren't eating it. To be honest though, I'm not sure what was worse, the texture or the taste. It was bad. Really, really, exceptionally bad. 
This contains lime juice & fresh cilantro.
Do not ever do this to your poor rice, it didn't do anything to you.

My mom saved the day, and family dinner which I had haphazardly agreed to host, by running down the street to a local Chinese restaurant and picking up a few containers of white rice. They know how to make rice not suck, I apparently should be taking notes.


Sunday, January 22, 2012

Big Bang Bars

Big Bang Bars (noun) - Cookie bars which contain the ingredients from which all other cookies are derived.

I wish I could claim credit for the name of these delicious beasts, but in fact the name came from a fellow redditor (kanthropology) who came to the rescue when I was looking to replace the name Garbage cookies, with something a bit more appetizing. To reward her efforts I shipped her a batch of these yummy newly named treats. The name is perfect because it's nerdy - much like their maker - and because these delectable treats do provide a BIG BANG with each bite.

Not pictured: Coconut

When I was a kid my father cooked precisely 3 things: chili that was way too spicy for consumption by children, mac n' cheese, and these cookies. He always called them garbage cookies and made them from whatever garbage was sitting in the cabinets that looked appealing at the time. Each batch come out a little different because you never knew what he was going to throw in them. They also are always made in bar form because he was far too lazy to be bothered with drop cookies.

These have always been my favorite cookies because they have a little bit of everything, all mixed into one. I have taken my father's not so scientific approach to cookie making and refined the process down to a simple recipe that can be shared and re-created. Perhaps some of the magic is lost now that the recipe is committed in written form, but I like to think the memory lingers and perhaps gains momentum now that others can share in the joy.

I know that "everything" cookies aren't anything unique or original for most families, but I choose to believe there's something unique here. If for no other reason than the small memory of childhood that comes rushing back when the warm gooey joy hits my lips.

So readers I give to you: Garbage Cookies 2.0 → Big Bang Bites
Ingredients
  • 1 stick of butter, softened
  • 3/4 c brown sugar
  • 1/2 granulated sugar
  • 1 egg
  • 1 1/2 tsp vanilla
  • 1 1/4 c peanut butter
  • 1 cup coconut
  • 1 1/2 c flour
  • 1 tsp baking soda
  • 1 cup/6 oz/ 1/2 bag chocolate chips
  • 1 c raisins
  • 3 cups uncooked oatmeal

I make a note, for posterity's sake of mixing these cookies by hand. The only reason I do this is because we didn't own a mixer when I was a kid, so I feel like I'm cheating the memory by bustin' out the Kitchenaid.

The Steps
  1. Preheat the oven to 350°.
  2. Line a 9x9 pan with aluminum foil (optional).
  3. Spray pan/aluminum foil with non-stick cooking spray.
  4. Combine the butter & sugars and mix until creamy.
  5. Add the egg and vanilla, mix until incorporated.

  6. Add in the peanut butter, stirring again until fully incorporated.
  7. Add in the coconut, stir, incorporate, etc.
  8. Add the baking soda & flour and mix well.
  9. Fold in the chocolate chips & raisins.

  10. Add the oatmeal slowly, mixing completely with each addition.
  11. Press the dough into the greased pan.

  12. Bake for 35-40 minutes. Bars should appear mostly cooked but slightly soft in the center.
    A tooth pick should come out clean, but doesn't always if you end up hitting a cash of chocolate chips. I always hit chocolate chips.
    The bars are slightly drier than normal cookies, but that's part of their charm in my opinion. You can always play with the recipe and find out what works best for your tastes. 
  13. Remove from oven, allow to cool for at least 20 minutes before cutting.


Optional Drizzle
  • 1 cup chocolate
  • 1/4 c shortening

  1. Melt the chocolate.
  2. Stir in shortening, mix until completely smooth.
  3. Drizzle over bars.


...and there you have it. I hope people try this recipe and enjoy these cookies as much as I do. I'd love to hear what other variations people add into their everything cookies.

Happy noming.


Wednesday, January 18, 2012

Week 2 (Cooking) - Fried Rice, Sesame Chicken, & Coconut Ice Cream

We're now onto week two of the 52 weeks of cooking challenge and our theme, inspired by the Chinese New Year, is Chinese cuisine. Hey-ho something else I have no expertise in. I always thought I was a decently well rounded cook but the challenges are making me second guess myself. Hrmmm...

My apologies if my recipes (or dishes themselves for that matter) are less than authentic. I tried to do my research and stick with recipes that were Chinese in origin and not inadvertently veer off into another ethnicity which is apparently easier than I had realized. Anyone who is more knowledgeable on the subject can feel free to lecture me on my shortcomings.

My original idea was to keep it simple and go with chicken fried rice, but gradually over the course of a few days I realized that simple just wasn't me; I started searching for more recipe and realized I already had everything in the house to make sesame chicken. It was decided, a mini Chinese  feast was to be had. All though I'm sure this is somewhat Americanized Chinese I was still excited to take this on.

The menu consisted of two main dishes and a yummy dessert of questionable orient origins. Vegetable fried rice, sesame chicken, and coconut ice cream.


Sesame Chicken
The recipe I started from came from food.com. I have my suspicions that this recipe had a heavy American hand, but is sounded delicious and most importantly, doable. This recipe needed a fair bit of altering to reach a flavor level that was appealing though. The sauce was kind of bland in the beginning and needed more spices to bring in to life; I added extra red pepper flakes and ginger, and cloves of garlic to bring in some flavor.

At the suggestion of the creator of the recipe I went ahead and doubled the sauce needed because the original recipe apparently made just enough to toss the chicken in and I am a sauce girl. I love dipping things in sauce, doesn't matter what it is, if I can dip it, I do. It turns out the sauce level was pretty good for the chicken, but it was still nice to have a little extra to drizzle over my rice.
  • 2-3 tbsp. sesame oil 
  • Boneless skinless chicken tenders approx. 2 lbs. cut into 1 in pieces
  • 1 c honey
  • 1 c reduced sodium soy sauce
  • 2 c water
  • 4 tbsp corn starch
  • 4 tsp fresh grated ginger
  • 5 tsp red pepper flakes - they claim these are optional, not in my house
  • 5 cloves garlic, minced
  • 1-2 tbsp toasted sesame seeds
Sauce
  1. Combine the honey, soy sauce, and water. 
  2. Whisk in cornstarch until completely dispersed.
  3. Add ginger, red pepper flakes, and garlic.
  4. Stir to combine. 
  5. Set aside.
Chicken
  1. Heat the oil in a wok over medium high heat.
  2. Stir fry the chicken.
  3. When chicken is no longer pink and starting to brown on the outside add in about half the sauce.
  4. Cook until sauce begins to thicken.
  5. In a separate pan add the remainder of the sauce over medium high heat as well and cook, stirring often until it begins to thicken as well.
  6. Reduce heat, cover, and simmer for 10 minutes.
  7. Serve portions with toasted sesame seeds sprinkled on top.
Save some for leftovers, trust me, on day two this went from yum delicious warm food to OMG give me a shovel to eat with.

**Note - do not pay extra for toasted sesame seeds (or coconut for that matter, but I'll get to that) just buy regular sesame seeds and toast them in the oven at about 200° for 5-10 minutes shaking every few minutes to assure even toasting. It's that simple.


 - - - - - - - - - - - 

Vegetable Fried Rice
The fried rice recipe I decided upon came from allrecipes.com and was originally slated to be chicken fried rice. I removed the chicken since there would be a chicken main course. I also excluded the celery (because I hate celery) and the red bell pepper in exchange for a whole green pepper, it was cheaper this way. It turns out fried rice is stupidly easy and I've been afraid of attempting it all these years for nothing.
  • 1/2-1 tbsp sesame oil
  • 1/2 tbsp hot chili oil - For the bold
  • 1 yellow onion diced
  • 2 tbsp reduced sodium soy sauce
  • 2 large carrots shredded - I shred them to mask the flavor, I also hate carrots. Man I look picky now!
  • 1 cup fresh pea pods
  • 1 large green pepper diced
  • 6 cups cooked and chilled white rice - I made rice with dinner the night before and just made sure to have plenty of extra for this
  • Additional 1/3 c reduced sodium soy sauce
  1. Heat oil in wok over medium high heat. 
  2. Add onion and saute until soft, about 5 minutes.
  3. Add the 2 tbsp of soy sauce and carrots, pea pods, & green peppers. Stir from 5-6 minutes or until veggies loose a bit of their crispness but are still al dente.
  4. Add rice and the last 1/3 c soy sauce, stiring slowly and breaking up clumps.
  5. Heat until cooked through. 
  6. Serve hot.

If I could do it over...
The only thing I'd really change in this recipe is the portions; this batch was massive. By the time I finished cooking the veggies I was well aware of the fact that I had no room left in my wok for the rice. So I halved the veggies, and the rice and cooked one smaller batch with what I had. The rest of the rice and veggies are packaged away separately for round two later this week. After we finish eating the leftovers from round one.

Okay, I lied, I'd also change the recipe by adding more pea pods. I loooove pea pods. 

 - - - - - - - - - - - 

Coconut Ice Cream
Last but not least, coconut ice cream. This recipe came from an about.com series about Chinese food, so I'm hoping it's actually a Chinese dish, but I apologize if it's not. Either way, coconut ice cream is where it's at.

One of the things that caught my eye with this recipe is that there is not dairy, rather coconut milk is used in place. Mmm double coconut goodness.

I had to mess about here and there with this recipe to account for the fact that out of the three groceries stores I frequent, one with an entire section dedicated to Asian delights, I could not find unsweetened coconut flakes anywhere. I'm sure if I had time or energy to check a few more stores I could have tracked them down, but that just wasn't in the cards for this week.

  • 4 cups unsweetened coconut milk
  • 1/2 sugar
  • 1/4 tsp coconut extract
  • 1 1/4 c sweetened coconut flakes
  • Toasted coconut to garnish (see note above about toasting your own)


With an ice cream maker
  1. Combine all of the ingredients in the bowl of your ice cream maker.
  2. Stir to combine.
  3. Refrigerate cylinder and mixture for about an hour, or twenty minutes in the freezer for the impatient. 
  4. Do what ever magic you need to do to set up and get your ice cream maker moving. 
  5. Let it do it's thang.
  6. Remove when done doing it's thang.
  7. Eat.

Without an ice cream maker (you poor soul)
  1. Combine the coconut milk & sugar, stir until the sugar dissolves.
  2. Add the coconut extract and coconut flakes and mix until combined.
  3. Place in freezer and stir occasionally (every thirty minutes or so) until hardened.
  4. Once desired consistency is reached, eat it.
It turns out I am glad I had the sweetened coconut flakes, this recipe was very...un-ice-creamy. I am going to admit a foul on my part here and say that I am pretty sure I took this recipe from the orient to a Chicagoian back alley bakery. I originally tried to cut the sugar from the original recipe down since I was using sweetened coconut, but that didn't suit my tastes. So I added the full amount of sugar. Then I doubled the sugar content. Then I left it there out of fear of diabetes, but it still could have been a bit sweeter for my overly processed, high fructose corn syrup adjusted taste buds.

What I got was a sweet creamy dessert resembling in texture something between soft serve and "normal" ice cream. It was very delicious and not very sweet. I quite enjoyed it and will be going back to it to finish the batch.


If I could do it over...
I really wish I would have shredded the the shredded coconut. The individual strands were very long and awkward in a dessert. They made the ice cream chewy and strange. I didn't really mind, but the BF said it was a problem for him. When I make it again I will probably run the shredded coconut through the food processor to break it down further. Oh, and I'll probably add some chocolate chips too.


 - - - - - - - - - - -

All of the dishes were delicious and the entrees were even better on days two (and three, and...) I will most definitely be making each of these recipes again.


Thursday, December 8, 2011

Mad about Macroonis

Why I'm here.
In order to push myself to write a blog about cooking/baking I decided I needed to expand my horizons; I needed to reach out to these types of communities for inspiration. That first oomph of inspiration came from The Great Food Blogger Cookie Swap


The Great Food Blogger Cookie Swap 2011The gist was that I sign up to send out 3 packages of 1 dozen cookies to 3 fellow food bloggers, and in return receive 3 packages of cookies myself from secret santas. Then I have to blog the recipe. Read that again. I HAD to blog. Thus forcing myself to do something that, though I quite enjoy it, I keepfalling short in completing the task.


Now that the details are out of the way let me tell you about the cookies. I chose to make my (grand?)mother's macroonis. I don't know exactly where in the family tree this recipe came from, but I do know that from a very young age these have been my favorite cookies. And that is saying a lot from a girl who loves cookies.


What is a macrooni?
Every single time I get asked this question I kind of freeze up during my response. 
Q: "What exactly is a macrooni?"
A: "Awesome. Next question."
Really though, macroonis are coconut, chocolatey, orange bliss. And lucky for you I am obligated herein to provide you with the recipe.

The recipe.
  • 4 eggs
  • 1 cup sugar
  • 2 tbsp melted butter
  • 2 tsp orange zest
  • 2 tsp vanilla
  • 1 tsp orange extract (optional)
  • 4 cups sweetened coconut
  • 1 1/2 cup flour
  •  12 oz. chocolate chips

Be careful to not overmix the cookies otherwise they will spread out and lose their shape.
  1. Preheat your oven to 375°.
  2. Quickly mix the eggs, sugar, melted butter, zest vanilla, and orange extract.
  3. Fold in the coconut.
  4. Fold in the flour.
  5. Stir in the chocolate chips.
  6. Drop by rounded tbsp onto a greased (or lined with parchment paper) cookie sheet.
  7. Bake for 11-14 minutes. The edges of the coconut should be lightly browned but the centers should still look soft.
  8. Cool on the cookie sheet for 10 minutes.
  9. Eat warm, or allow to cool the rest of the way and store in an airtight container for up to a week.


I know I said I'd post a Thanksgiving post, but my life has been very...chaotic as of late, and I was unable to devote the proper time to get together a post worth reading. Attempting to actually have totally put together posts each week(ish) instead of constant half-assery.

Tuesday, September 27, 2011

Matcha-do about nothing

Disclaimer: Let me just start off by saying this is my first blog post, or attempt at blogging, in a very long time. It's not going to have spectacular formatting or writing, and yes, the whole thing is setup from a template. All of this will (hopefully) improve as time goes by.  But for now... 


Early last week I set out on an adventure...
Task: to create cupcakes for someone I knew very little about.
Challenge accepted.


My short checklist of what I knew about her:


  • She's a she
  • She's Chinese/Canadian (I think)
  • She's wicked brainy and on the nerdy side
  • She loves Japanese culture
  • She's a rather adventurous eater (My favorite kind!)


So after some quick soul (read: stomach) searching here's what I decided upon; green tea cupcakes, mandarin orange filling, and coconut buttercream frosting. Sounds easy, actually carrying out the tasks was another story.


To start I went in search of a green tea cake recipe, which turned out to be harder to find than I had predicted. I sifted through probably 50 recipes give or take that I didn't like for one reason or another.  However, I did quickly noticed a common theme, they all called for matcha (green tea powder I'm told), which I of course didn't know anything about.  I diligently made my trip to my local all things under the sun grocery store in search of this magic powder.
Asian aisle - nope.
Tea aisle - nope.
Asian aisle #2 that I randomly found - nope...
So I left the store empty handed; which is to say I bought all my other groceries but not the one thing I specifically went out of my way for.


Back to searching  through pages of recipes I settled on one that seemed decent enough. Then, of course, the day I was set out to start the actual baking I changed my mind completely and picked out a new one. But still this pesky issue of matcha ..., I would not be detered; to the internet! I found through a quick search that I could make (!) matcha by putting green tea into my coffee grinder and grinding the f*ck out of it. Seriously guys, this took forever.


Marjorie -1 
Ridiculously hard to find/non-existent green tea powder - 0


For reference, I took about 10 green tea bags, cut them open, and emptied the contents into my grinder. Grind, grind, griiiiiinnnnnnd. Check consistency, nope still solid, shake everything loose. Repeat. I'd say it took me about 7-8 solid minutes of grinding to get to what I would call a powder. This resulted in a little over a tablespoon of powder after being ground down.


And this is the cake recipe I finally decided upon.


Let me just say that this cake was quite, ummmmm, interesting, to  make. Even with all my other baking concoctions, when I'm doing a quick (cup)cake I still turn to a box mix a large portion of the time. This one was very time consuming amongst other issues. Luckily I decided to make the cake the night before so I wasn't pressed for time, and in the end but it was totally worth it. The cake smelled amazing going into the oven, and softly sweet coming out, the green tea added a really pleasant natural green hue to the cakes. I sadly am not familiar with sponge cake and over-baked these just a teensy bit; which is a catastrophic no-no in my book. I let it slide because I didn't have the supplies, energy or time to make a second batch, they weren't burnt after all, just a little more darker brown than I cared for. I let them cook over night covered and went back at them in the morning.


For the filling I went with an awesome mandarin orange marmalade that I stumbled across at the grocery store. It was delicious and bright orange which contrasted nicely with the soft green cakes; but a gigantic hassle to coerce through a decorating bag. The marmalade had long strings of candied orange peel that, though delicious, clogged my bismark tip completely. So I decided to go with a Wilton tip # 12 and some brute force to fill the cupcakes. I had to basically jam the tip through the admittedly rough skin of the cupcake and squeeze like mad to get anything to come out. Repeat, TWENTY. THREE. MORE. TIMES.


Finally, for the frosting, well, umm, you see, ... I didn't have a recipe. Much like the cake I looked at recipe after recipe of coconut buttercream and couldn't find one that I thought was right and quite a few of them had raw egg(s) in them; more than a little out of date I suppose. So I did what any level headed, mildly irate baker does, I winged (wung?) it with things I had in the house. (Yes, I do keep coconut milk in my cabinet, why do you ask?)  And let me tell you that this was the best decision I have ever made. The frosting was amazing and I can't wait to use it again and again and again...


Here's my recipe:


  • 1/2c butter softened to room temperature
  • 1/2c pure vegetable shortening
  • 3tbsp coconut milk
  • 1tsp coconut extract
  • 5c confectioner sugar approx.


Add the butter, shortening, extract, and coconut milk in a large bowl and mix until smooth and creamy. I use my kitchen aid, but for those without this gift from the gods, you'll at least need a hand mixer. Add the sugar one cup at a time until the desired consistency is achieved. I used all five and got perfectly flavored, still slightly thin frosting. It was great for what I needed.


Now, if you're satisfied here, you're done, but if you're like me and always need to push things a bit farther, add a cup or so of shredded coconut to the mix for a fun texture and smidge of bonus flavor. VoilĂ , frosting magique!  I left the frosting white because I didn't want to add more color and thus detract away from the fun natural green and orange I had already. Plus it would have clashed with the polka dot cupcake wrappers ;)


I attempted to pipe this onto the cupcakes with my standard lazyman's cupcake tip #1M, but the frosting  was too thick to go on pretty from the shredded coconut, so again I changed tactics. I did my least favorite thing and begrudgingly frosted each cupcake with an angled spatula and my hands, as if it were the stone age or something.


Once the cupcakes were finished being frosted there was still something missing, they needed a pop of decoration, hrmmm... I decided to quick toast some coconut and sprinkled it over each cupcake, shaking loose the excess. After this I grabbed a can of mandarin oranges in light syrup, drained them, and added one piece of orange to the center of each cupcake laying flat, with the curve facing left. Magnifiqué!


Phew, done and done. Delivered them to a surprised and happy friend and delighted in the joy people receive from (surprise) cupcakes. That feeling, at that moment, throws any and all frustrations from the task out the window.


I apologize for the lack of pictures for this post, I hope to rectify that going forward, but I didn't have a camera handy for this one.